株式会社ジオセンスのモジュールにて、M5stackをダッキングさせ、実際に動作テストしてみます。
ちなみにジオセンスは、善意の基地局にもなっています。
今回はZED-F9P搭載M5F9PのファームウェアをMacでの書き込み解説と、実際のテスト運用までやってみます。
ハードの接続
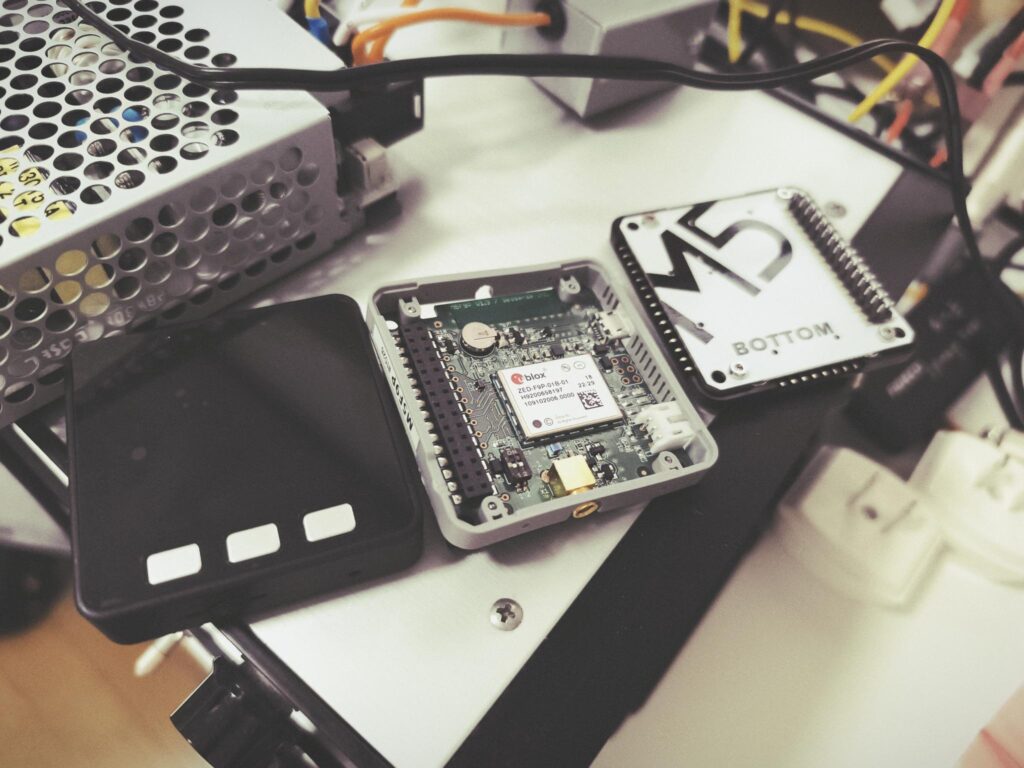
ジオセンスの解説でもありますが、こんな感じでM5stackbasicをばらして、真ん中に挟み込む感じ。
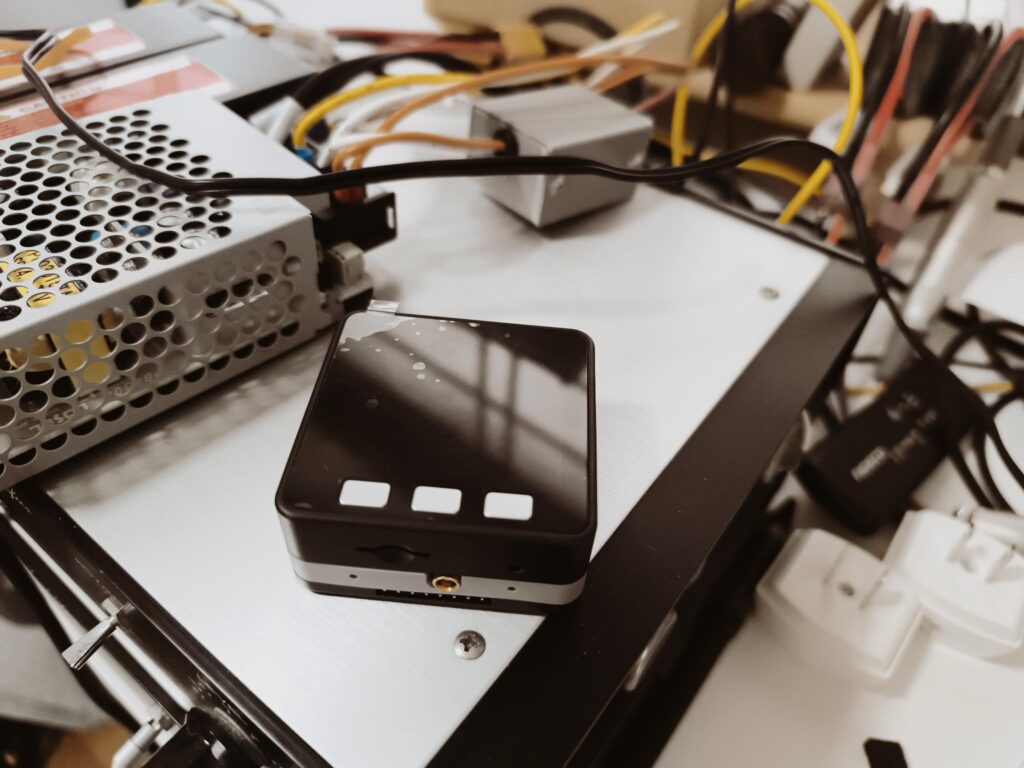
これで一個になりました。
ちなみに、M5stackは3mmx18mmのネジで片方を締め付けることができます。
M1 Mac での M5F9P ファーム書き込み手順
株式会社ジオセンスの説明書にはWindows版でしたので、Mac版を記載します。
ファームウェアはジオセンスからダウンロード。
あとはコマンドで操作すればOKです。
cdコマンドでフォルダを指定しますが、重要なのは、Macの場合は、esptool.py をインストールする必要があること。
pip3 install --upgrade esptool

ファームの中身を確認。
中身を確認したらポートを間違えないようにしてインストールしてください。
cd /あなたのダウンロードした場所/m5f9pFW_v1_0_3

esptool.py --chip esp32 --port /dev/cu.ここにあなたのデバイスポート\
 --baud 460800 write_flash -z \
 0x1000 bootloader_qio_80m.bin \
 0x8000 m5f9p.ino.partitions.bin \
 0x10000 m5f9p.ino.bin
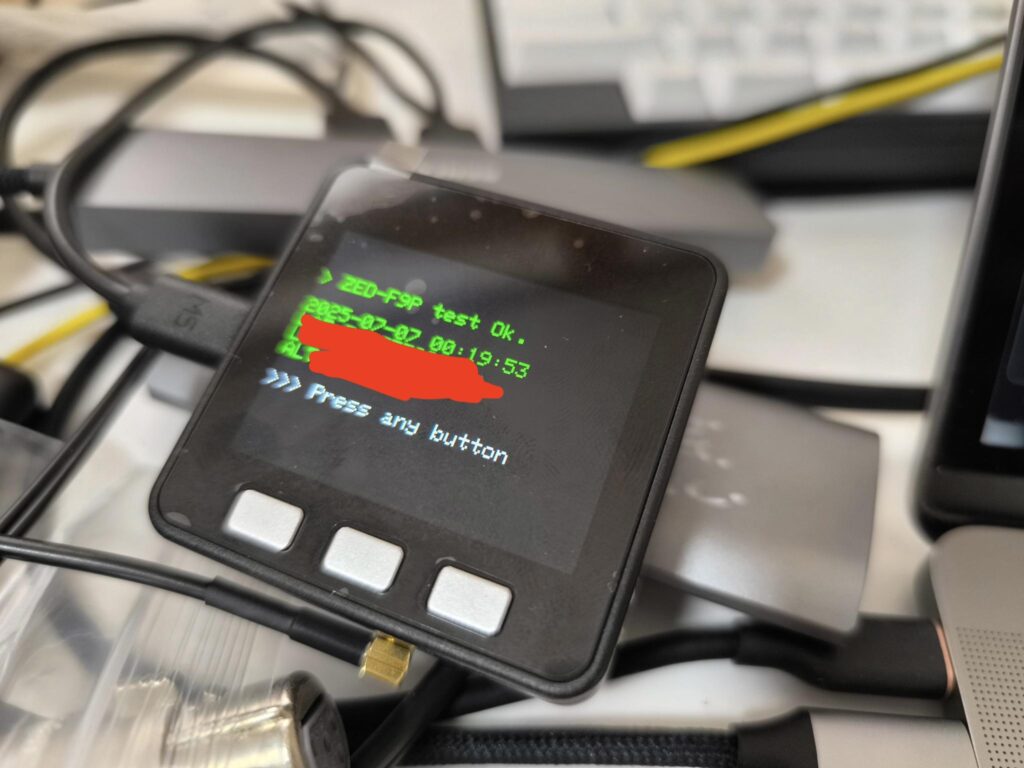
これでOK!
あとはジオセンスのガイド通りに設定すれば、無事に座標を獲得できました。
ZED-F9Pでの基本取得
ファームウェアの設定が完了したので、wifiを接続せずに、単体のみで取得できるようにプログラムしていきます。
ZED-F9P単体での取得は通常取得なので、誤差3m〜5mほどと言われています。
それでもかなりの精度であると思いますが、RTK取得はまだできていませんのでご注意!
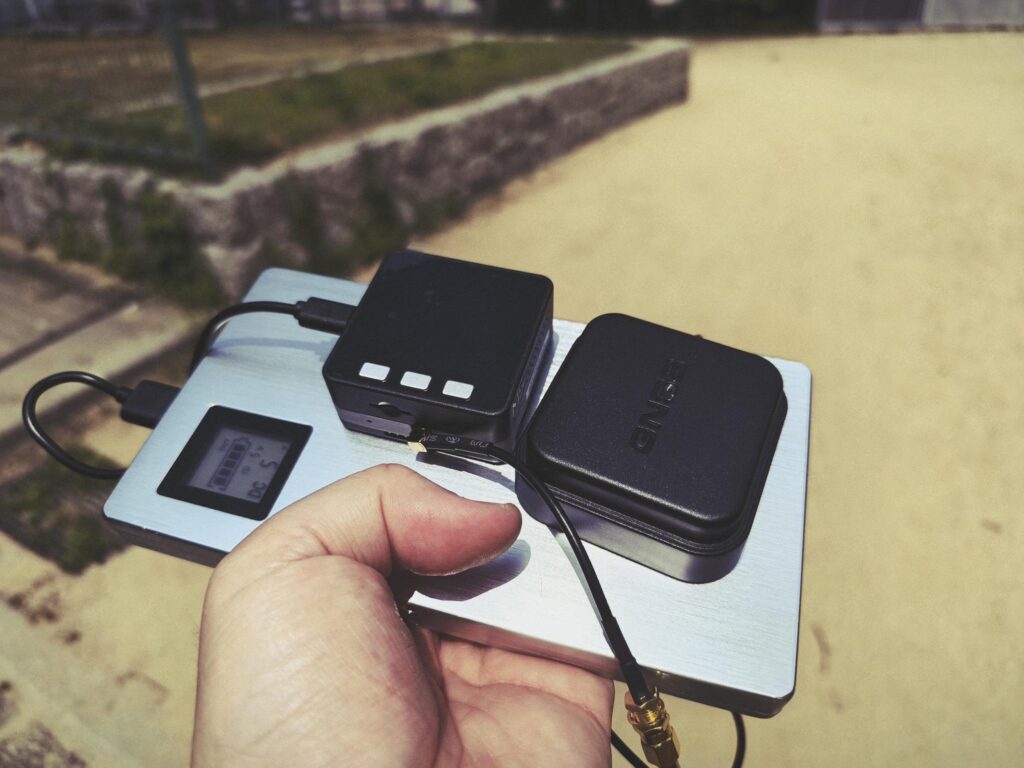
モバイルバッテリーが必要になりますので、準備し、衛星とつながるような場所を選んでください。
/**
 * @file      M5F9P_CenterShow.ino
 * @brief     A: GNSS 初期化, B: 測位取得(中央表示・何度でも)
 * @author    こうたろうさん
 *
 * - M5Unified + SparkFun u-blox GNSS v3 を使用
 * - 旧/新 M5GFX どちらでもビルド可(textDatum + drawString 使用)
 * - 標準単独測位(RTK 補正なし)
 */

#include <M5Unified.h>
#include <Wire.h>
#include <SparkFun_u-blox_GNSS_Arduino_Library.h>

// ========== グローバル ==========
SFE_UBLOX_GNSS gnss;
bool  gnssReady   = false;
const uint8_t TXT_SIZE = 2;      // フォントサイズ

// ========== ユーティリティ:中央に 3 行まで描画 ==========
void centerPrint(const String& l1,
                 const String& l2,
                 const String& l3 = "") {

  M5.Display.fillScreen(BLACK);
  M5.Display.setTextSize(TXT_SIZE);
  M5.Display.setTextColor(WHITE);
  M5.Display.setTextDatum(MC_DATUM);           // Middle-Center anchor

  const int16_t w = M5.Display.width();
  const int16_t h = M5.Display.height();
  const int16_t lineH = M5.Display.fontHeight() + 4; // 行間

  const int lines = l3.isEmpty() ? 2 : 3;
  const int totalH = lineH * lines;
  int16_t y = (h - totalH) / 2 + lineH / 2;   // 1 行目中央

  M5.Display.drawString(l1, w / 2, y);
  y += lineH;
  M5.Display.drawString(l2, w / 2, y);
  if (!l3.isEmpty()) {
    y += lineH;
    M5.Display.drawString(l3, w / 2, y);
  }
}

// ========== GNSS 初期化 ==========
void prepareGNSS() {
  centerPrint("Preparing GNSS...", "", "");
  if (!gnss.begin(Wire)) {
    centerPrint("GNSS NOT FOUND!", "", "");
    gnssReady = false;
    return;
  }
  gnss.setNavigationFrequency(1);  // 1 Hz
  gnss.setAutoPVT(true);           // NAV-PVT 自動配信
  gnssReady = true;
  centerPrint("GNSS READY.", "WAIT FOR FIX...", "");
}

// ========== 測位表示 ==========
void showPosition() {
  if (!gnssReady) {
    centerPrint("GNSS NOT READY.", "PRESS A FIRST!", "");
    return;
  }

  gnss.checkUblox();
  if (!gnss.getPVT()) {
    centerPrint("NO NEW DATA.", "", "");
    return;
  }
  if (gnss.getInvalidLlh()) {
    centerPrint("NO VALID FIX.", "", "");
    return;
  }

  double lat = gnss.getLatitude()  / 1e7;
  double lon = gnss.getLongitude() / 1e7;
  uint8_t fix = gnss.getFixType();
  uint8_t sv  = gnss.getSIV();

  char b1[48], b2[48], b3[48];
  snprintf(b1, sizeof(b1), "Lat: %.7f", lat);
  snprintf(b2, sizeof(b2), "Lon: %.7f", lon);
  snprintf(b3, sizeof(b3), "Fix:%d  Sat:%d", fix, sv);

  centerPrint(b1, b2, b3);
}

// ========== Arduino 標準関数 ==========
void setup() {
  auto cfg = M5.config();
  cfg.serial_baudrate = 115200;
  cfg.output_power    = true;      // 5 V ライン ON
  M5.begin(cfg);

  M5.Display.setRotation(1);       // USB 端子が下
  centerPrint("A: PREPARE GNSS", "B: GET POSITION", "");

  Wire.begin();
  Wire.setClock(400000);           // 400 kHz I²C
}

void loop() {
  M5.update();
  if (M5.BtnA.wasPressed()) prepareGNSS();
  if (M5.BtnB.wasPressed()) showPosition();
  if (gnssReady) gnss.checkUblox();
  delay(2);                        // 軽いアイドル
}
こちらのサンプルコードで無事に取得。
Aボタンで取得待機、Bボタンで取得としました。
Wi-Fi 経由で基準局に接続格安SIMなどの場合はそもそもブロックされていることが多いそうです。

音楽家:朝比奈幸太郎
神戸生まれ。2025 年、40 年近く住んだ神戸を離れ北海道・十勝へ移住。
録音エンジニア五島昭彦氏より金田式バランス電流伝送 DC 録音技術を承継し、
ヴィンテージ機材で高品位録音を実践。
ヒーリング音響ブランド「Curanz Sounds」でソルフェジオ周波数音源を配信。
“音の文化を未来へ”届ける活動を展開中。